Feeds:
Posts
Comments

Posts Tagged ‘Mixed Media’

Hello Everybody, Lauren and Teddy up on the A2Z Scraplets blog today with a couple of tags this time.

We had such fun making this mixed media Tag of the Sea.   We started by using some Texture paste on with A2Z Scraplets Stencil Flourishes and then painting the all over with Ranger Distress Paint Broken China and then some sponging of Bundled Sage over the top.  When dry I sponged with Inka Gold Aquamarine with added water to get the mottled look.

Next came some decorating with seashell, netting, charms and microbeads over a coat of white glue (dries clear) and some touches of colour  Viva Inca Gold in colours of Gold, Jade and Rose Quartz.
When I was happy with the decorated look, I added some Inka Gold in Cobalt Blue around the edge and put the bubbles on and the A2Z Scraplets Hello.   The hello was done in Inka Gold Charcoal and Cobalt Blue and then coated with Crackle Accents.

This Christmas Tag was done with and embossing folder from Courture Creations that was sprayed with Colourblast Shimmer Spray Deep Water.

Lace and netting to decorate, a pine die cut for the foliage and the Memory Box Luxe Pointsettia .  Merry Christmas added with the A2Z Scraplets Xmas Tree

The Christmas Tree was embossed using Stampendous EP in Shabby White, I just love this stuff!!!

Now I just what to show you some different effects that can be obtained by some crackle mediums.  I love crackle, or the look of it.  All the below examples are painted prior to using a crackle medium on them.

This first one, is done in Inkssentials Crackle Accents.  Only the triangles were done, covering the sides of the triangles in one single line of medium and then pulling it to the centre, so that it was really dimensional.

This one Wrought Iron  was done with Viva Crackle Medium and gives a more opaque finish and a different effect of really squiggly cracks.  The medium was applied all over and fairly thickly.  I applied this with a palette knife as this is easier for me than a brush.

This leaf was done with Crackle Accents, I really like the way this gives the line effect at the edges of all the leaves (Simple Greens).  I must experiment more with the way this is applied as I think I get different effects with different ways of applying it.

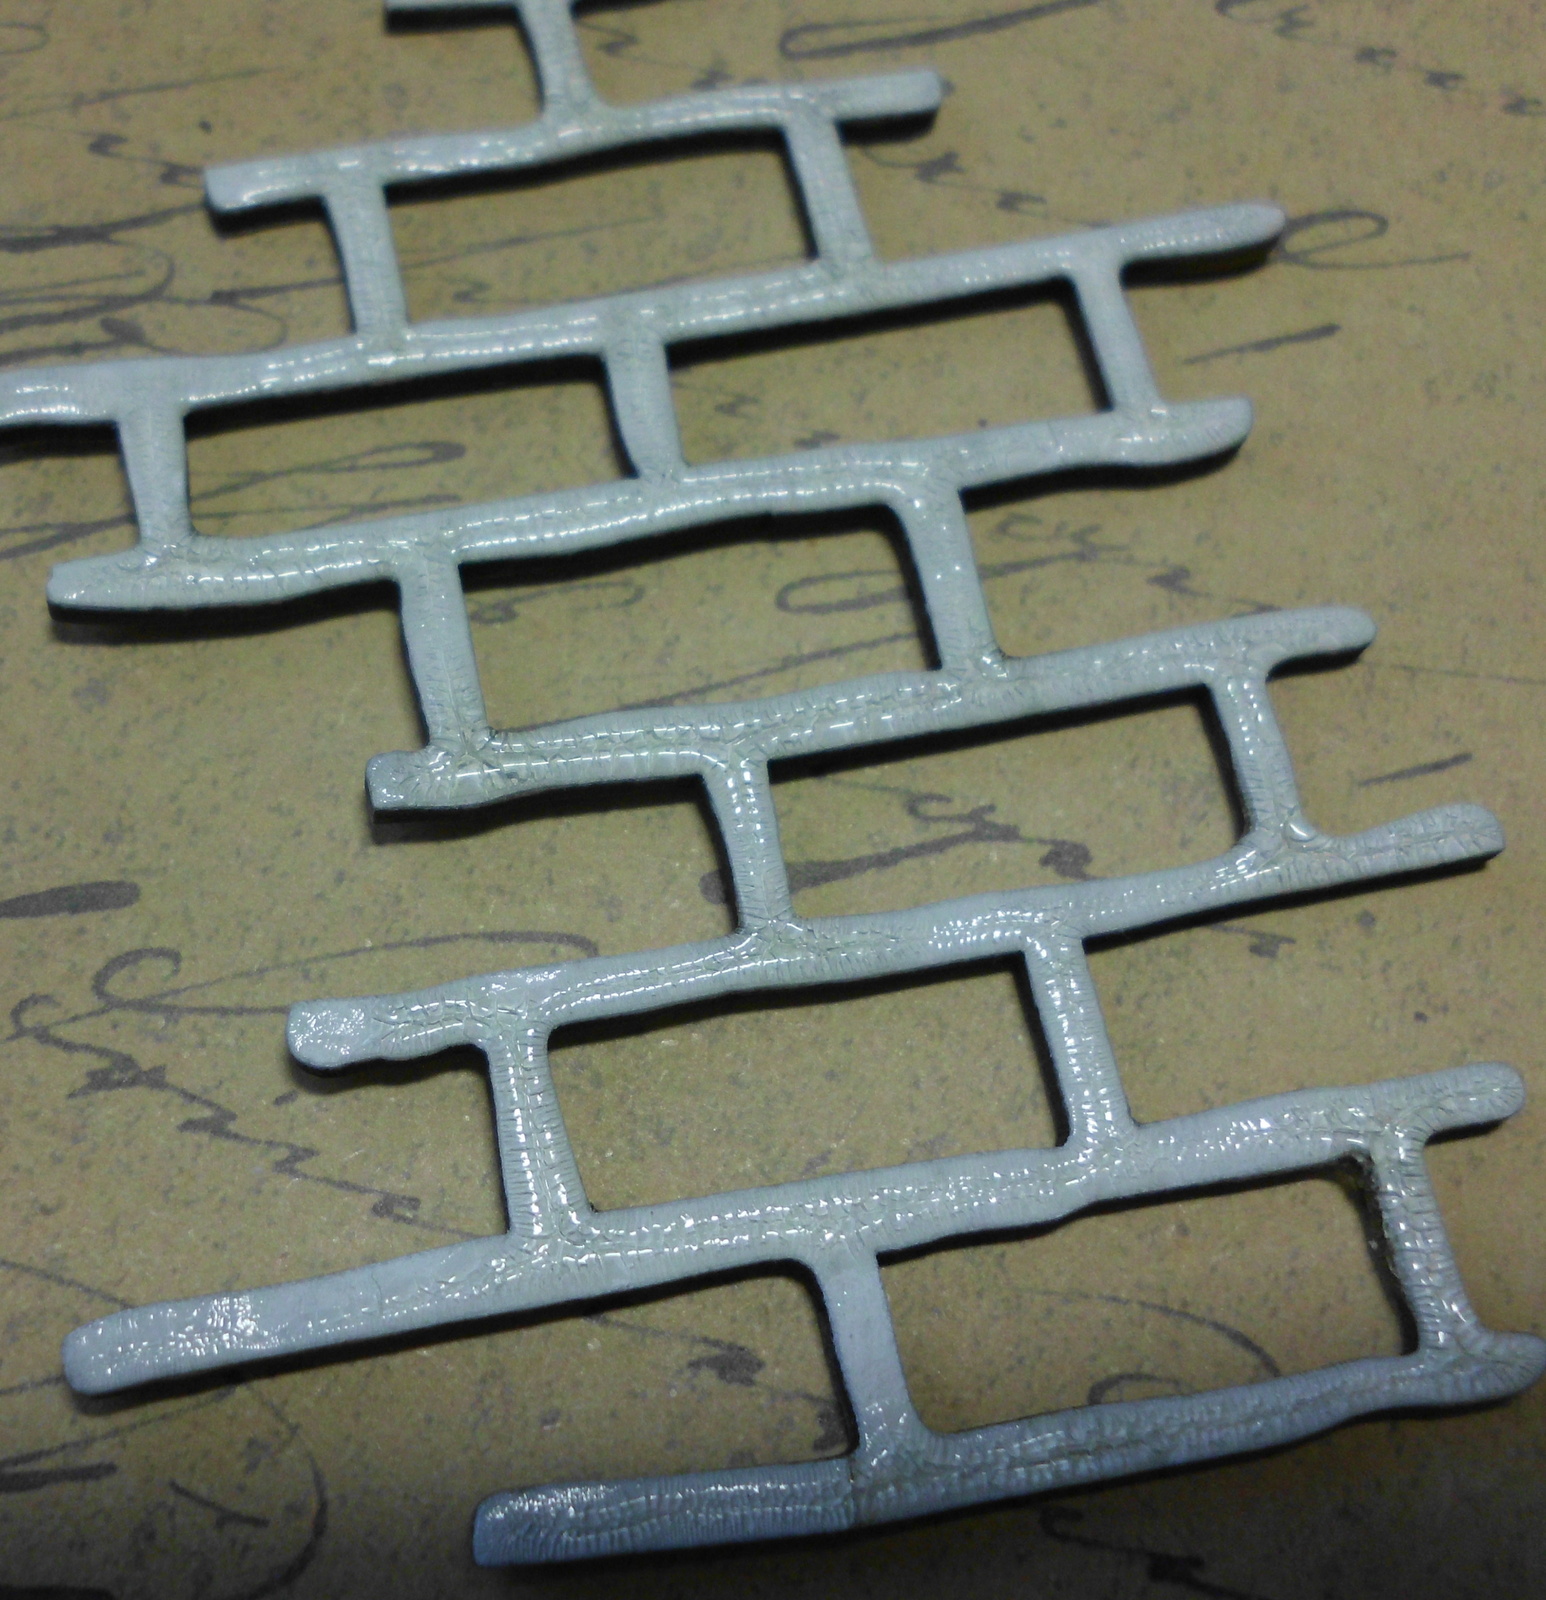
The Brickwork Pieces is done with Ranger Distress Crackle Paint in Rock Candy.  I love the little squares of crackle this gives, and will give the same effect thick or thin.  This was applied with the brush that comes in the bottle of Crackle Paint.

Now you want my conclusions……. you are just busting to know that I find the crackling effect of all three products amazing……. for ease of use I say the Crackle Accents by Inkssentials is fool proof as it has an applicator nozzle and for lazy people like me it is so easy to use!!!!

Well that’s it for us this time, thanks for calling in.

Love Lauren and Teddy

Read Full Post »

Hello Everyone,


Teddy has decided to share his fabulous texture paste recipes, we love playing with this stuff on canvas and on cards.


Before we bet onto the gooey stuff we will show you a canvas made with it (mixed with paint for colour of course).


SANY3104

And some cards too, I love playing with this stuff, and I love stencils too!!

SANY3114


SANY3022


SANY3024

Great effects with paint on the stamps too.


So now for the recipes 🙂

Rough Texture Paste

1/2 cup Baking Soda
2 Tablespoons white school glue or PVA
1-2 Tablespoons White Acrylic Paint
(some water may be necessary)
Instructions:  I took an air tight container and put in my baking soda.  I then added the glue, acrylic paint and started mixing.  I used a couple of disposable chopsticks to mix it up.  I just mixed to get a smooth consistency, I added a few drops of water to get it to the consistency I wanted.  There are many types of texture mediums in the store, from light to heavy, so the amount of water you add will depend on the heaviness of the texture you are looking for.  Done!

(The mixture keeps well in the air tight container……..some of the moisture float on top,  just give it a stir and it will be good to go!)

Smooth Texture Paste

1/4 cup Talcum Powder (I used Johnsons Baby Powder, Make it smell good too!!)
1 tablespoon White All purpose School Glue or PVA
1 tablespoon White Craft Paint
Some Water
Instructions: I began by mixing all the above ingredients with a bit of water until I had the consistency I was looking for.  I tested the texture by letting the medium drop from my stir stick.  If it flattened out quickly into the rest of the mixture, I added too much water.  I fixed this by adding more of the talcum powder until I felt the texture would hold nicely when applied to a mask.  Personally, I like the talcum powder version better than the baking soda!  Just use an old credit card or a pallet knife to apply the mixture to your mask or stencil….you’ll love the results!
So that’s it for Teddy this week, hope you like it 😉
Hugs 🙂
Lauren


Read Full Post »

Hello Everyone,


I have been Skycrafting with my friend Lisa and we always do great stuff when we get together.  Lisa was going to do a class on a canvas in the sytle of She Art, and she inspired me to make this 🙂


SANY1995


Awww……. so much texture, so many elements, so much build up and I love the finished product.


SANY2000


The top part of the canvas, gotta love that little birdie!!


SANY1999


And another little birdie hiding down the bottom, awww….


SANY2002


Love the flowes, all those roses were sprayed with Dylusions spray ink (love that stuff).


The background was stamped onto tissue paper and then adhered to the canvas with PVA, who would have thought you could do that??? See Miss Lisa taught me something again!!


So get on over to see what she has created, it will be well worth the visit!!!


Hugs 🙂


Lauren


Read Full Post »